
This part will be the longest one. I will try to share everything I have done in my setup just in case someone new to this subject might be trying to implement this.
Let me start by saying what I am using in my setup:
Linux Ubuntu 16.0.4 LTS
NginX 1.11.6
Arut's RTMP Module - Master version
After Ubuntu installed, change the root password.
sudo passwd root
Nginx will listen to 1935 and 80 and maybe 8080 but I will disable my firewall for this lab and check the status.
Sudo ufw disableSudo ufw status
Change the Computer Name
sudo gedit /etc/hostname /etc/hosts
I will also want to install GUI Desktop: I dont know why but after I ran the commands below. I found that ubuntu desktop was not installed. So I re-run apt-get update and apt-get install ubuntu-desktop for the second time and desktop installd with success. After desktop is installed run once more sudo apt-get update to get latest updates for desktop.
Sudo apt-get update
Sudo apt-get install ubuntu-desktop
Sudo shutdown –r now
I want to be able to Remote Access on my server
sudo apt-get install dconf-toolsCtrl+F and search on dconf "remote-access"
remote-access > enabled - uncheck !!!
remote-access > require-encryption - uncheck
remote-access > vnc-password - set the correct password
Just search and type Desktop Sharing set the password and enable remote access again on Ubuntu desktop.
Connect using VNC.
Installing Nginx with RTMP module:
sudo apt-get update
sudo apt-get install unzip
Install necessary tools first by using the command below
sudo apt-get install build-essential libpcre3 libpcre3-dev libssl-dev
Make a working directory, switch to it and download Nginx.
mkdir ~/working
cd ~/working
wget http://nginx.org/download/nginx-1.11.6.tar.gz
Next, get the RTMP module source code from git:
wget https://github.com/arut/nginx-rtmp-module/archive/master.zipUnpack/unzip them both, and enter the nginx directory:
 tar -zxvf nginx-1.11.6.tar.gz   #Unzip Nginx
 unzip master.zip   #Unzip RTMP module
 cd nginx-1.11.6    #Switch to the Nginx directory.
Now we build nginx:
./configure --with-http_ssl_module --add-module=../nginx-rtmp-module-master
make
sudo make install
Install the Nginx init scripts to start nginx at boot.
sudo wget https://raw.github.com/JasonGiedymin/nginx-init-ubuntu/master/nginx -O /etc/init.d/nginx

sudo chmod +x /etc/init.d/nginx

sudo update-rc.d nginx defaults
Start and stop Nginx to generate configuration files.
sudo service nginx start

sudo service nginx stop
Configure nginx to use RTMP.
sudo nano /usr/local/nginx/conf/nginx.conf
Scroll to the bottom of the configuration file and pasted the following code:
rtmp {
    server {
            listen 1935;
            chunk_size 4096;
            application live {
                    live on;
                    record off;
            }
     }
}
Restart Nginx
sudo service nginx restart
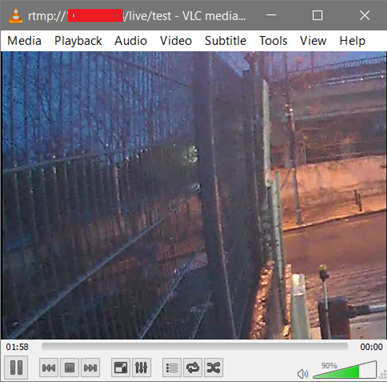
We can now test our RTMP stream by using VLC.
Open OBS setting (we mentioned in the previous article) go to Settings. Navigate to Stream Tab and choose type the Streaming Type as "Custom Streaming Server". In URL field type in rtmp://NginxServerIPAddress/live. In Stream Key field type in "test". Start VLC, Open a Network Stream and enter in rtmp://NginxIPAddress/live/test as the URL. Now you should be seeing the camera. It looks alright.
iOS devices do not support RTMP and most web-based players such as JW or Flow player require the Flash based version to play RTMP streams but iOS devices can not handle the Flash players. If you want to reach any device and any browsers the most proper solution is HLS. Before we implement HLS we need to install FFMPEG. Our next article explains how to install FFMPEG with Extra Encoding and Decoding Libraries.